Showing posts with label Cool. Show all posts

Sunday, March 9, 2014

Product Review: Ironheart Artisans Paint Brush Rack

As some of you know I have friends all over the country, and recently one of my friends from MD, Dameon, asked if I wanted a Brush rack that he had one of his friends (Alex from Ironheart Artisans) to make. After looking how sad my Coffee Mug full of brushes looked I gladly said yes.


Not knowing exactly what to expect I soon got a package in the mail....That package that had 5 MDF laser cut parts in it that was SO WONDERFUL smelling It took me back in time to when I could smell wood burning stoves and fireplaces. Being in South East Alabama now I dont get the opportunity to smell those anymore. Anyway I quickly assembled the brush rack (5 mins tops) and started putting it to use. When I had finished and saw how awesome this thing was I asked myself... "this thing is ONLY $10??". Its an amazing deal.

The Following pictures were taken from Ironheart Artisans WEBSITE and are used without their knowledge or permission:


My rack was a "MK1" test model so mine looked a bit different:


SO I needed to make mine a little more..... "Munkey". So I started up and set out to make it Hot rod!!! I got busy with the Airbrush and made some cool effects and then went to my Vinyl Plotter and whipped up some custom Flaming dice Stencils and airbrushed them to a piece of black poster board that I then  glued to the supports. Here is what it looked like when I was done:
Yea... Something I was happy to put my brushes on!!! Anyway Back to the review, Here is the cut and dry of it...

Pros:

  1. Price- At $10 you almost cant go wrong. Its a great deal.
  2. Design- its made to be easily loaded and unloaded and there is room on the "hooks" for multiple brushes OR for bigger brushes like terrain brushes or the like.
  3. Assembly- Its 5 parts and almost go together by themselves.... Easy to put together!!
  4. Sturdiness- Its Laser cut MDF and its built to last a while. I did put 6 drops of superglue on mine to lock the joins but they may not be needed.
  5. Smell- Laser cut MDF smells GREAT to me as I like the smell of a campfire and the great outdoors. This pleased me almost more than anything else...
Cons:
Long term storage- Someone mentioned that storing brushes horizontal for extended periods of time will cause the bristles to "bend"... While I don't know about this I will list it as a "con" because it was something someone on the internet wasn't happy with... and I needed ONE THING in the con section. ;) if you put your sheaths back on your brushes and actually use brush soap with them and take care of your brushes it should not be a problem

Overall I Love this holder and plan to purchase 2-3 more for other brushes I have I need to put up. Its a home run in my opinion and I am happy I got one. Its a great product and its easy on the wallet to boot.

Till next time 
Munkey!!

PS here are 2 more reviews from some of my buddies who recieved this product. check them out too if your not sold on what Im saying!!
My buddy Dameon who sent me mine- Khepri's Eternal Legion Blog
And my buddy Larry who had a good idea for an Alt use!! Djinn24 Youtube

Sunday, December 29, 2013

You Get What You Pay For!

Hello Everyone!

I am here blogging as a special guest on Munkey Joe's blog.  This is my first time using blogger so please bear with me if it comes out looking all weird. =) For those who might not know me, my name is Lyn Stahl.  I am the owner of Metalhead Minis- Commission Painting, Consignment, and Sales.  Metalhead Minis was established in 2009, but I have been painting and collecting since 1997. Aside from Metalhead Minis, I also teach painting at multiple conventions such as GenCon and Genghis Con, I compete in painting competitions, and write articles for multiple hobby magazines around the world such as Figure Painter Magazine.

I wanted to take a moment to post some information regarding obtaining commission paint jobs from professional painters.  Often times, when professional painters hangout and "talk shop", one of the most common topics is the fact that a lot of people feel our rates are too high and such.  I have been thinking that there is a missing piece to this puzzle.  The piece that I think is missing is that perhaps if people were honestly educated about why the prices are what they are that it might help the client side understand much better. I am hoping that this can be quite helpful all around. 

Now just to be clear, there are many different professional painting businesses out there and they all have different rates for different reasons.  For example, some businesses have overhead costs to consider as they might pay rent for a separate space to paint outside of their home. Some businesses might also outsource some of their work to save time, or charge per hour instead of a flat rate.  Keep in mind that while it might make the prices a little higher, this might be a system that works specifically for the business and serves as a benefit to both the painter's work and their clients.  My objective in writing this blog post is not to speak for all the miniature painting services out there. The information in this blog I have made sure to keep pretty general using average numbers and such as a "starting point" (for lack of a better term).  This is just to help people in the community have an understanding.

We all know the saying "Time is money."
When it comes to commission painting, it is no different. When professional painters are working on a paint job, our time is worth money. Professional painters put a lot of money and time into their skill to get to that point.
  • Paint and Supplies- Professional painters have to obtain a lot of supplies in order to start painting for clients.  These items include (but are definitely not limited to) : Green stuff, Milliput, basing supplies, brushes, paints, airbrush, drills, pins, glues, and mixing mediums.  These supplies can range from costing hundreds to thousands of dollars depending on how much they have of these items. 
  • Education- While this type of job does not require a college degree or a certification, the amount of time that an actual professional painter puts into learning their craft and staying up to date can run into just as many study hours.  The education is obtained through classes at different conventions, books, website/video tutorials, instructional DVDs, and paint club meetings.  
With these points considered alone, it is easy to see why a professional painter would want to earn a return on the hard work they have put in.
Professional painters who also compete and have won prestigious awards and commendations (I.E.- Golden Demon, Crystal Brush) might charge a higher rate which is understandable.  Many sleepless nights were had in order to perfect their competition pieces and show their dedication to the craft. A lot of the awards out there are actually not that easy to obtain.
Depending on what quality paint job you as the client are looking for, it must be understood that you "get what you pay for".  This is another saying that I am sure we are all familiar with.  Once or twice I am sure that at least some of you have either made a purchase, had a car repair, or home repair done.  Thought you were being given a great deal, it was super cheap, and then in the end found out that it was crap, and had to go somewhere else and pay a little more to have the job done right. There are a lot of horror stories in relation to commission painting through someone that was not a professional.  The most common ones:
  • This person charged me $20 (or some other low price) to paint my figure/s. It has been a year and I have not received it back yet.
  • This person charged me (insert low, low price here) to paint my figure/s and when I got them back they were not they were not painted the way I asked.  Now I have to get them repainted.
There are other horror stories, but I am sure these two alone should suffice. I am sure you get the point.

Let's talk about average hours and prices.  Again, keep in mind that this is an average to give you an informational starting point, not actual. Professional painters paint at different speeds and all do things differently. These averages are based on a 28mm miniature.
  • The average rate for a table top quality (gaming quality) painted figure is $10-$30 as they take about 1-3 hours to complete.
  • The average hourly rate that a commission painting business charges is $10-$15 per hour. 
  • High table top quality (a nicer table top quality that has more layering of colors and blending) figures take an average of 3-8 hours to complete. 
  • Display quality (collector quality, these models are primarily used for display cases) painted models take an average minimum of 20+ hours to paint.
Double the times for larger figures (I.E.- 54mm)
Triple the times for dragons. 

Most miniature painting services also charge separately for assembly, drilling, gap filling, and pinning. This is because depending on the figure, assembling a figure can take hours alone.  This especially holds true for larger figures and dragons. 

I hope that this has been helpful. =)
Please feel free to get in touch with me if you have other questions.
Happy Painting to All!

Metalhead Minis Website
Like Metalhead Minis on Facebook!

New UPDATES and Guests!!

Hello All!! Im posting a quick note to bid everyone a good end to 2013 and Welcome 2014 in!!  We have been busy this year despite Family issues and several setbacks. BUT here is whats up and what we are doing!!

#1 Help for Heroes Salamander Whirlwind
This was a charity project headed up by IDIC BEER and benefiting Help for Heroes in the UK. More info here.


#2 Toys for Tots Auction Dark Angels Angelus Redemptor Super-heavy Tank 40K
This was a combined effort of Blood And Skulls Industry and benefiting Toys for Tots. As of right now It has raised over $525 for them!!! Not much longer to go though but it will be a great thing for the Kiddies!!


And third I have Added Lyn Stahl from Metalhead Minis as a guest author for the blog. She is an Good friend of mine and part of My "Dallas Connection" collective of Painter Friends I know including Exiled Miniatures and Hamster Cage Studio.... Maybe  can get some of them to be Guest authors here as well... who knows!! Anyway I plan to have more content this year for you and some great eye candy!!

Upcoming projects:
I have some upcoming projects that are going to be fun!! Here are some of the plans:
Chaos Warhound Titan
Brass scorpion commission (from a defiler)
Finishing up the Marine Army
Painting IG catachans 
Painting IG cadians
Painting IG Armor
and some actual bust painting as well as my Painting comp Entries!!

Well thats what Is planned so Have a great new year and Serve the Emperor well!!


Saturday, May 18, 2013

MOAR VIDEOS!!!!

OK Guys Here are some more vids for you!!! First off the One part mold Video:

http://www.youtube.com/watch?v=AesASRoRecY

and Reconditioning Super Sculpey clay

http://www.youtube.com/watch?v=2lKaEhzva1Q


Again I have NO IDEA WTF Blogger is not locating my videos so I had to post links again.

Friday, December 14, 2012

HOW TO: Sandbag terrain

Hi Everyone!! Just a quick "TUT" of sorts for all of you aspiring guardsmen out there. I had to build up a piece of terrain for my local club and I decided to put a sandbag emplacement on it as the Original had a small crappy one on it. Anyway here is how I did it.

First off I got my base and planned directly on it. I got a piece of scrap plywood I had and put Foamcore on it with a hot glue gun. The foamcore is so I can actually hollow out an area for the emplacement. After that I drew out the area for the actual building to set so I can place it back later after I build up some areas. I then cut out the emplacement area and used filler to smooth out the edges.
After then I made a pattern of the hole I cut out to have a place to build up my sandbags. I do this as not to smash the foamcore while trying to texture and build the wall. Also the filler was still wet and it gave me a dry area to build on.


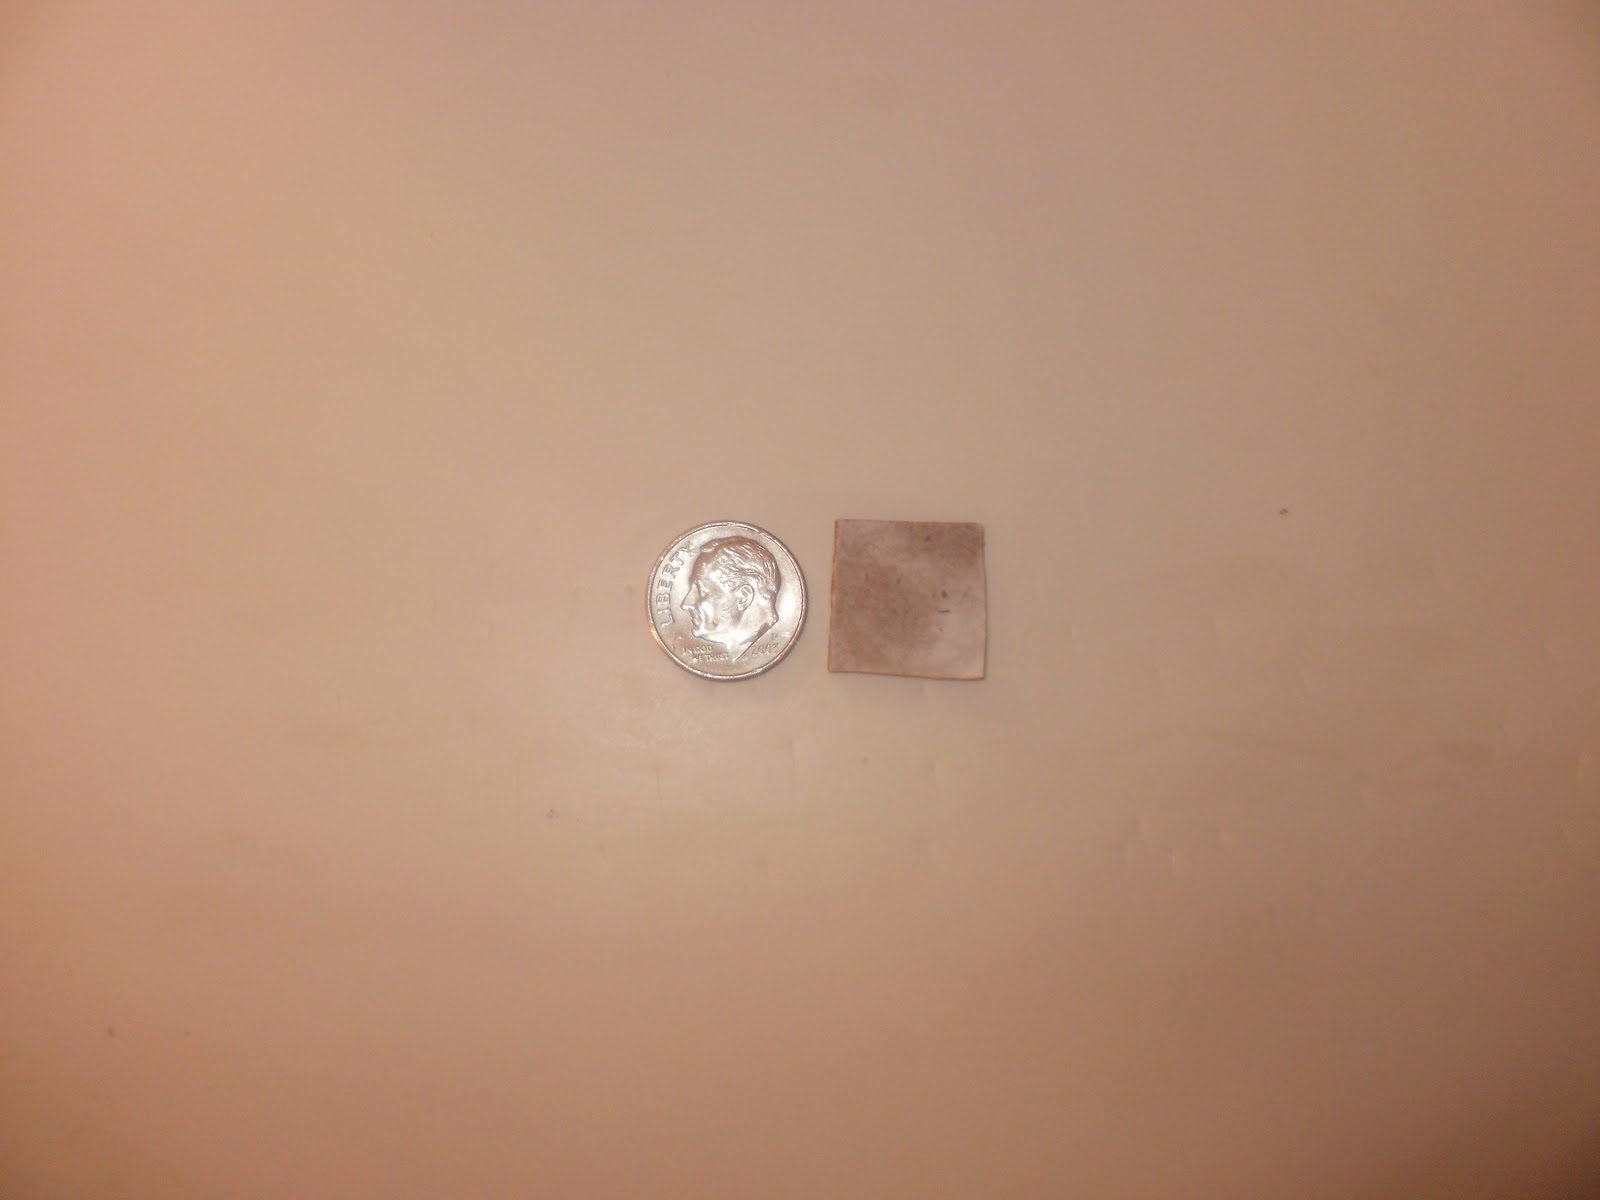
From there I decided to make a "jig" so my bags are all around the same size. I just cut a square out of cardboard about the size of a dime. 


From there I just roll out sculpy and make a snake. I cut off enough to be manageable and go to town.

From there I roll it out some more and then flatten it out to form a flat snake.
Then I lay my jig on the Snake and cut out the bags.....

I then take these squares and use my fingers to round them out some to soften the corners and make them more "bag-like".

After I round out a bunch of them and have a good supply I then start to build my wall. I build in a "true" fashion and interlock the bags. this adds stability to the bags wall and realism.  If your needing help with this Google Sanbag bunkers and the like and you should get some good pictures. Anyway interlocking them makes them look real and remember they are NOT PERFECT so dont be afraid to misalign them a tad bit. SOME people texture them either by pressing cloth into them OR putting cloth band aides on their fingers and pressing their fingers into them. Also a good idea is to take a sculpting blade or knife edge and score a "seam" into the edge of the bags. I did not do this in these because I was in a rush and forgot. Oh well its only a club peice and when I repair it I will do it next time!!! LOL

Here is the bunker wall I made and then baked to make it hard. I then glued it to the base and painted it. I will show pics of that in the next day or so.


And Thats it!! Thats how I built the sand bag wall!!

SO Whats been going on the past MONTH??

Ok well it HAS been almost a month since I have updated BUT this is my Busy time of the year with my Work and real life. Not to make excuses though I have made a LITTLE progress on some projects and will share those now.

Dark Hunter Marines
I have made very little progress on them. I have sprued the pads for casting and Will be casting them soon, HOPEFULLY later today. We will see.

Commission Painting
I have made a little progress here. I have assembled and primed them and decided I do not like the way they are attached to their "Tabs" so I am cutting them off the tabs and going to make special bases for them all. I am going to start with the Dwarf or the Assassin And go from there. Both were sawn from their tabs and mounted to a painting holder. I will have pics of these sometime soon.

Steampunk chest
This is where I have made the most progress here. I have torn down a old paper shredder we had for some Large gears and little "oddities" and I will cast these in Resin (they are metal!!) so I can shape them easier. I have bought a reproduction  license from Dragon Forge to use his Gears in the sculpt and have assembled quite the collection of Gears and bobs to make the sculpt. I also have purchased Bronze powder for it and have a good idea of what I am going to be doing. Now that  I have most everything at hand I will be sculpting the box as soon as I get some scrapbooking foil. I am using a method I learned from a friend who scrapbooked and its a texturing technique that looks Just fantastic. Here is a pic of how it will look


The sculpt itself will be mostly foamcore as a base and will be then cast in resin once sculpted. It SHOULD be a cool little chest for nick nacks and I am considering making 2-3 sizes and shapes. Maybe a pencil holder also... Dunno. We shall see here too....LOL

Terrain.
I have made a couple pieces of terrain for the club in this month. Nothing real fancy but I built a generic building and a building with a sandbag pit. I will post the sandbag pit one after this post as I made a little tut for it.

Comp Painting
I have really not done much here, but I am Gearing up for it. I found an old Ertl model of an ATST i had and think I might build and paint that as well as the Dust stuff and other ideas I had. Im running out of time for sure BUT Its for gencon so i do have some time. I just might not be doing everything I wanted and concentrate on a couple of projects.

Work and real life
THIS is where most of my time has gone. Im working alot as everyone wants to take off from work to Hunt and spend holidays with Family SO I have been doing alot of OT. ALOT!! Also as My Wifes family will be coming down to MD for the holidays We are cleaning and digging in storage to get all the Decorations out and all of the extra stuff IN. The Family sleeps in the spare room and that unfortunately is where my paints and such are set up SO But getting ready for Family I am having to bury my hobby stuff.

Anyway Thats whats been going on around here so Keep you Thought pure and Purge the Filthy Xenos!!
Munkey!!

Friday, November 16, 2012

Marine Update And Painting commission!!!

OK Well first things first Lets do a Dark Hunter Update:

OK well I have all of the troops repaired and Primered now and have started painting with Blue Spray paint. I am doing the "Ron Saikowski Dark and Fast Method" that uses Spray paint to achieve a Very quick and good looking basic zenithal highlighting effect for a model. Im using Rustoleum Midnight Blue over Primer Black.  This is giving me a VERY DARK blue. Im gonna actually say TOO dark. So Im going to continue and lighten up the blues with the old trusty Airbrush and try to get some color varients in there so it doesnt look like blue spraypainted models on the table. Here is a couple of Pics of the WIP...


Now I realize the models are NOT very visible in the pics BUT Thats what I got for right now. NOw I posted a "early release" of this post on a forum of Hobbyists I am a member of Called The Terran Guard And some Guys PMed me about how I made my Jigs to hold the models and for more pictures of them in action... SO I DID take some and you can see some of the models closer there.


SO Thats about how I did them... Heres a breakdown
I drilled a hole into a foot of EVERY TROOP. I then cut toothpicks in half with nippers and glued them in the hole in the foot where the pointy part was down. This will serve as a attachment and holder for while Im painting and allow me to hold the mini without touching it. You can see the tooth picks on the minis in the pictures. From there I drilled holes into a scrap board I had to allow the toothpicks to go into to allow the minis to have a stand for holding them while drying and such. Thhis allows me to hold and paint the mionis and gives me a place to set them to allow the primer and paints to dry. Sometimes I find the toothpicks Kinda fiddly so I often push the toothpicks into some sort of "Cork" to serve as a Larger area to hold. I normally have Wine corks I use BUT on such a large project I dont have NEAR that many SO i went to my Local craft store to find some. Corks were expensive at Jo Ann fabrics So I went to the Foamy section and picked up some "foam Marshmallows" to serve as Corks. These were Called "Darice Foamies Shapes-Marshmallows" and cost about 2-3 bucks for 15. I found that using these they were not Heavy enough nor wide enough to support the mini Like real corks would so I had to build a "jig" to hold them. SO I went to Home depot, bought a 2x3 framing stud for a dollar (Literally $1!!!) and sawed it into 4-2 foot sections. I then took a 1 inch paddle bit and drilled one inch hole in the board to put the marshmallows. You can see Both of my Jigs in the  pictures. And TA_DA!!! I have a painting jig and holder for painting!!

I ALSO Got my Shoulder pads in the Mail from Ben AKA Fleafa at mastercrafted.co.uk And they look AMAZING!!! Here Look!!!


Well Crap.... Trust me then. They Look GREAT!!! I bought these and the rights to cast them up so Look for a mold making post and casting post sometime in the near future.

And Also I got another package in the mail..... Minis for a "commission" paintjob!!! Oliver AKA 01i From Table Warfare Sent out 5 minis for me to paint up for him and photograph and in return I get to KEEP THEM!!! They seem to be decent enough sculpts and I look forward to putting them together and painting them up. My goal on them is to have all 5 painted and based before Valentines day. That gives me 3 months to paint them to a HIGH standard and also continue working on my projects and Comp pieces for Gencon..... Oh wait did I say Painting Comp pieces for Gencon??? Yea I did....Oops, I guess the cats out of the bag now Huh???


OK Well that about does it for now, SO Recite your Devotionals, Dont Waste your Ration Bars, And Serve the Emperor Well...

Munkey!!